Textile MockUp in Photoshop CC.
How to change part of an image so that it looks natural. How to change the color or texture of an item without having to take a new photo each time?
When we have a white object, and therefore no texture applied, when it is flat, meaning it lacks any texture (structure), and when it is evenly lit… all it takes is changing the color. The situation becomes more complex when we are dealing with a combination of these properties.
In this post, I have presented one of the best methods, in my opinion, for an effective visual change of an item. This subject is similar to skin retouching, but much more complex because, when modifying skin, we aim for a uniform effect, whereas here we want to replicate the effect as faithfully as possible.
I focused on two very important changes here. Applying a new texture to a given area and applying the original texture’s pattern, as well as reflecting the lighting used in the photo onto the new material.
The photo and texture pattern are sourced from Unsplash, links below:
- Applying texture and pattern.
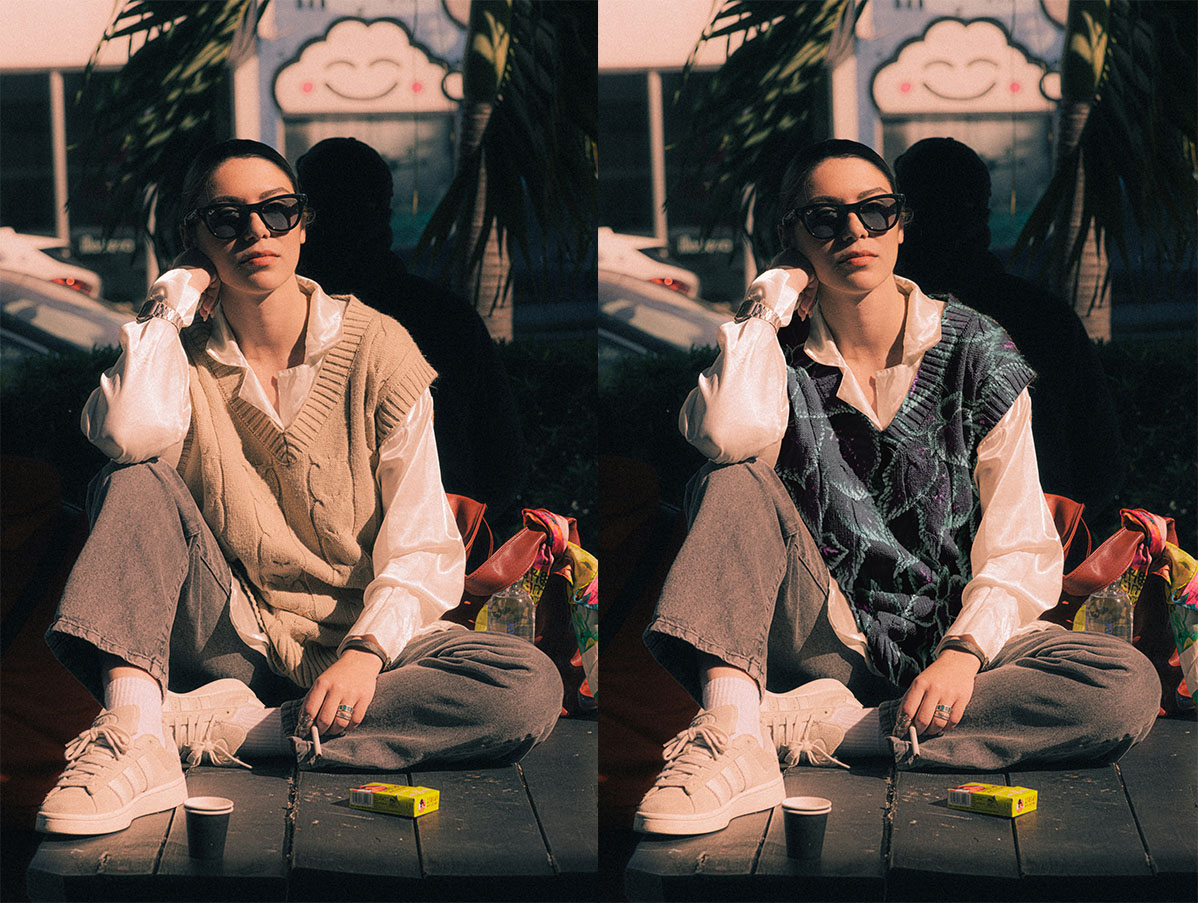
a) The change involved clothing, where I used an exact path to mark the area with softened edges (Pen Tool + Feather), after which the texture was appropriately stretched and adjusted to the selection (Warp).
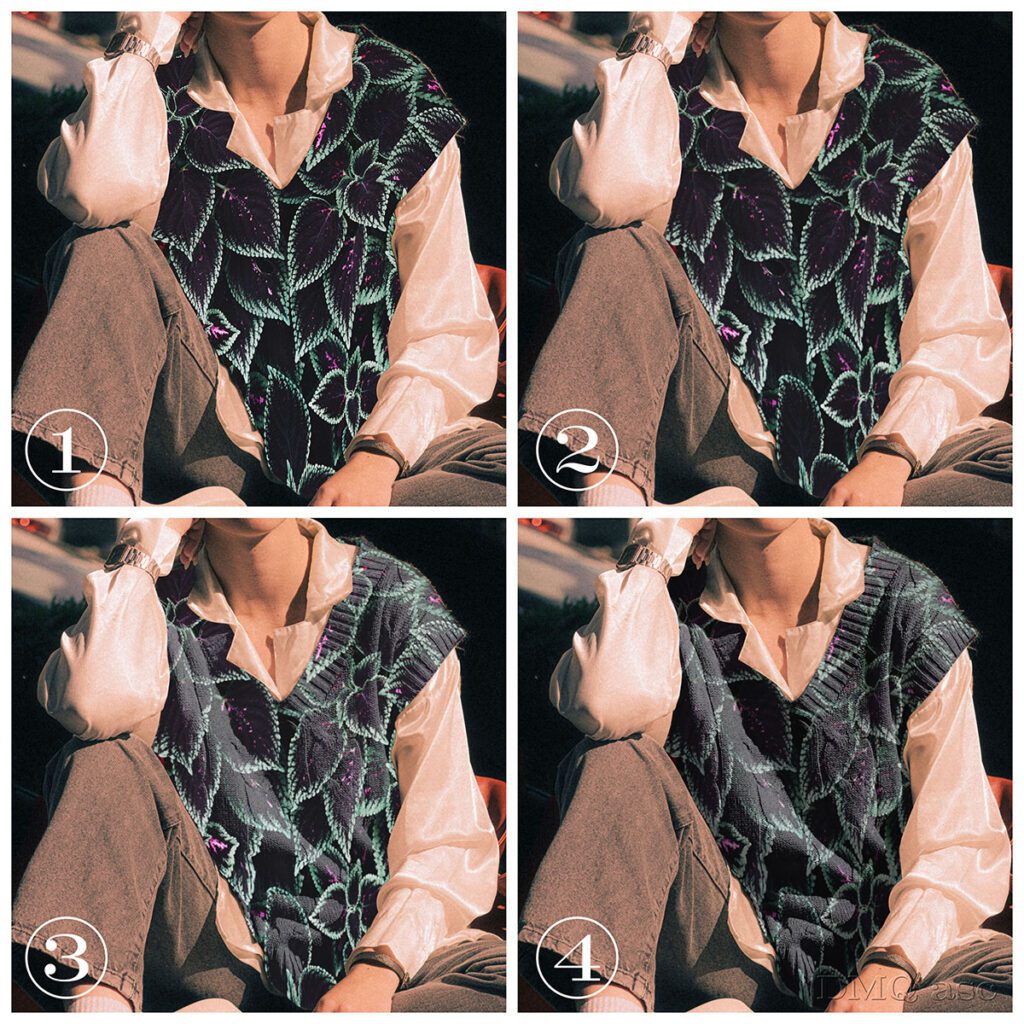
b) The material is wrinkled, so the texture was further adjusted to fit the folds. Here, my goal was to keep the texture intact for flat surfaces and to distort it as much as possible for areas with extreme curvature (Liquify + Freeze mask).
c) To best convey the texture, I used two filters. The first aimed at capturing the most information about the wrinkling (Desaturate + Blur), while the second aimed at providing the most information about the texture (High pass + Desaturate). Both filters were used to reflect the texture in separate saved files (Displace).
d) The entire image was slightly blurred to mimic the softness of the fabric (Blur). - Replicating light and shadow. (To achieve depth, we need the play of light, as without it, the image looks too flat).
a) Lights
The area was desaturated and darkened, with highlights retained, and intensity reduced (raising shadows) with adjusted material opacity (Desaturate + Curves + Levels + Screen [blend mode]).
b) Shadows
The area was desaturated and darkened with adjusted material opacity (Desaturate + Curves + Multiply [blend mode]).
c) I turned off the light adjustments at the edges of the area to allow for a natural ending (Black brush at white layer mask).
For the final touch, I added ambient shadows, although their use depends on the specific case.
Usually, when modifying parts of an image, noise is added to balance the view (grain), but I did not use this filter here to better demonstrate the effect.
The photo is taken in a very pleasant Orange-Tilt tone, meaning that lighter tones acquire an orange hue, while darker tones take on a blue tint, but again, I did not apply these changes here for better demonstration of the effect.
The first photo illustrates the situation before and after the change. The second photo shows selected stages of material transformation.
Photo:
Frankie Cordoba (Unsplash)
https://unsplash.com/
Texture:
Daniel Öberg (Unsplash)
https://unsplash.com/
The selected graphics illustrate my skills in changing and affecting the visual appearance of a person, object, or landscape based on the original background. The final effect is subjective and covers a specific time frame. Each of us perceives things differently, and each of us has a different time frame or skill set. Posts published periodically with a specific thematic project aim to systematically collect materials illustrating graphic possibilities.
Enjoy watching!