
How do you combine several photos into one? How do you hide one photo inside part of another? How do you turn 20 photos into a single image?
Double exposure, triple exposure, and so on.
The simplest way to convey this effect is by outlining the main subject—usually the contour of a body or head—inside which another photo is inserted, plain and simple. The outline of the main subject also serves as a mask for the target image. That alone is enough to create the effect, but it can just as well be expanded. You can make it highly advanced, layering a dozen or more elements. Instead of just the outline, you can emphasize the shape and play with light and shadow. You can also use different types of brushes—some breaking the subject into fragments of a given shape, others adding shapes—because a brush can just as easily be… another object, like a tree or a bush.
In this post, I present five attempts at creating photo exposures. These are mixes of different elements, without any strict rules about how things should behave. Another person could create completely different effects using the same tools. What matters is the final outcome… and it’s hard to end up with an effect that doesn’t look good.
Apart from embedding a photo within the outline of another element, the outline can also serve as a separator between images with different colors or lighting—that’s often enough.
While creating these five graphics, I considered designing elements that imitate an exploding subject, but I decided against it, choosing instead to emphasize the effect of hiding one photo inside another. The fragmentation effect had already appeared in my post from March 15th, where I broke apart an ice-made hand, and again in my post from September 11th, 2024, where I fragmented parts of a departing airplane within a single frame. Since fragmentation works better with motion rather than static images, I chose not to use it here.
However, in some of the works I did apply displacement—a technique that distorts a texture to mimic a 3D effect of the original material. I used a similar effect in my post from December 8th, 2024, where the texture of a new sweater was matched to the folds, and the floral pattern was distorted to create a 3D illusion. It’s purely a play of light and shadow, pulled from a black-and-white original to achieve the 3D effect.
All the graphics were created in Adobe Photoshop, based on photos taken by me or generated in MidJourney. The brushes I used were either from Adobe’s resources or custom-made from photos, used either to replicate them with randomized scale and rotation, or to cut elements out for shaped layer masks.
As for the masks, aside from brush-driven visibility, I also applied various transparency levels. In some works, I used backgrounds created with Adobe filters or generated with AI in MidJourney.
To emphasize the 3D effect, in addition to displacement, I added highlights of different shapes on separate masks, mostly using levels adjustment layers. To unify all the photos, I blended them to match colors and exposure.
For consistency and to soften the borders between different layers, I mostly used a soft brush, and in the final step I applied grain. This makes it difficult to tell how many photos were actually used—the noise helps hide the artificial look of composited layers.
The last effect I used here is puppet warp in Photoshop. This tool allows you to bend elements into the desired shape so they fit the final composition. Puppet warp is also an excellent effect for creating animations in After Effects from Illustrator graphics. You can easily animate a walking person using puppet warp points and keyframes on the AE timeline.
A very brief description of the graphics used here:
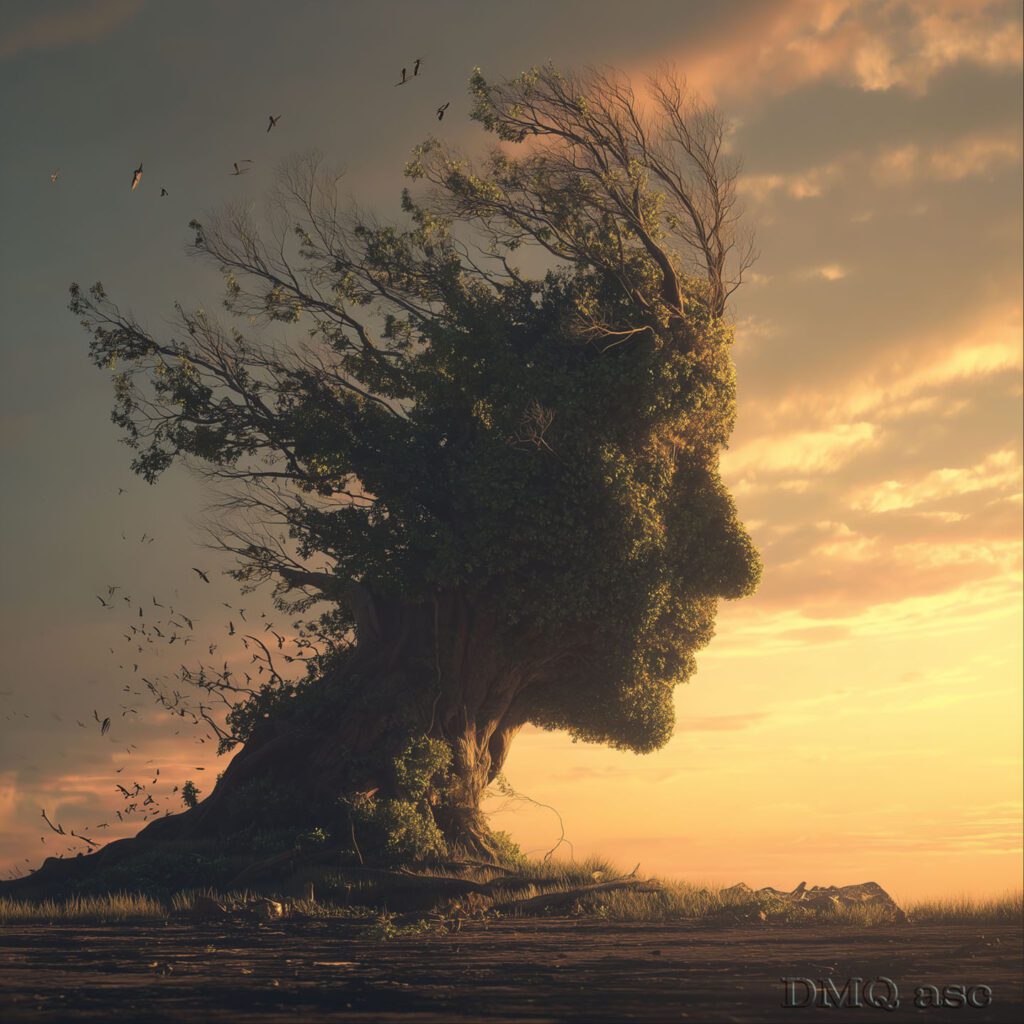
1. The base was a single photo, while the shape itself was created without any deeper meaning. Trees and bushes are rotated 90 degrees and either hidden or revealed with masks of varying brush softness. The background is uniform, and in contact with the trees it creates a fog-like impression.
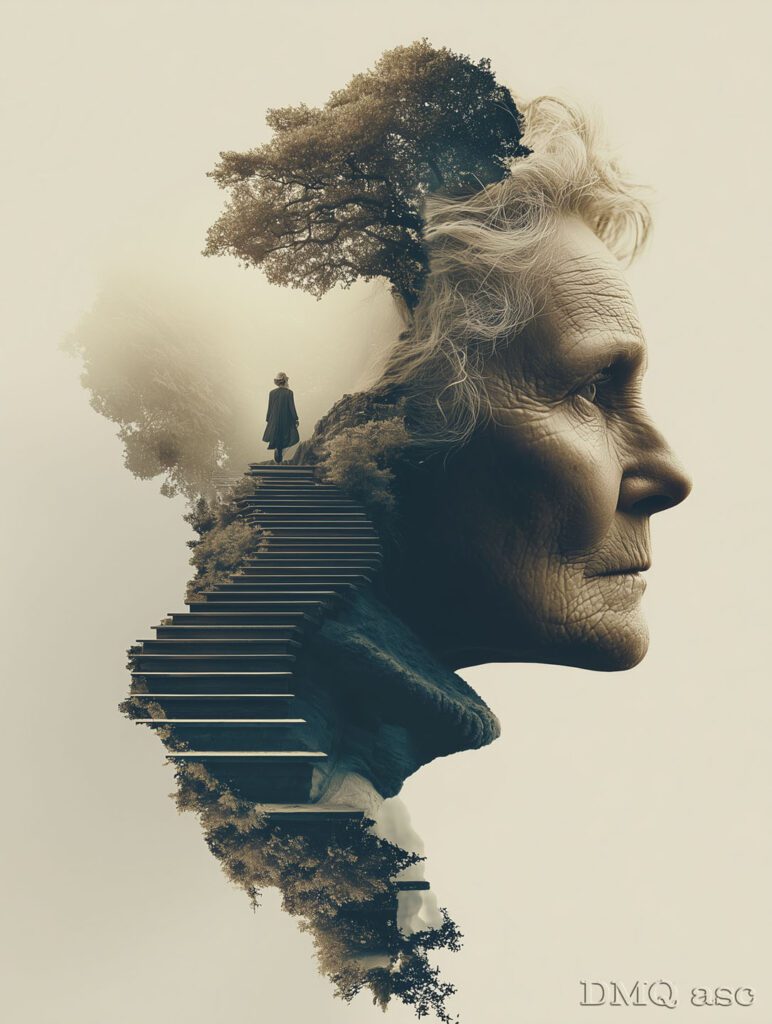
2. The outline is the profile of a person, where I mainly focused on preserving the shape of the face. Multiple layers of leaves were stacked, scaled, and rotated, with an added light layer to achieve a 3D effect. The neck was bent from another photo using puppet warp, the hair was a photo reshaped to match the outline, and the scattered elements are distorted leaves. The background comes from another image of the sky and ground. A subtle sepia tone was applied for the final effect.
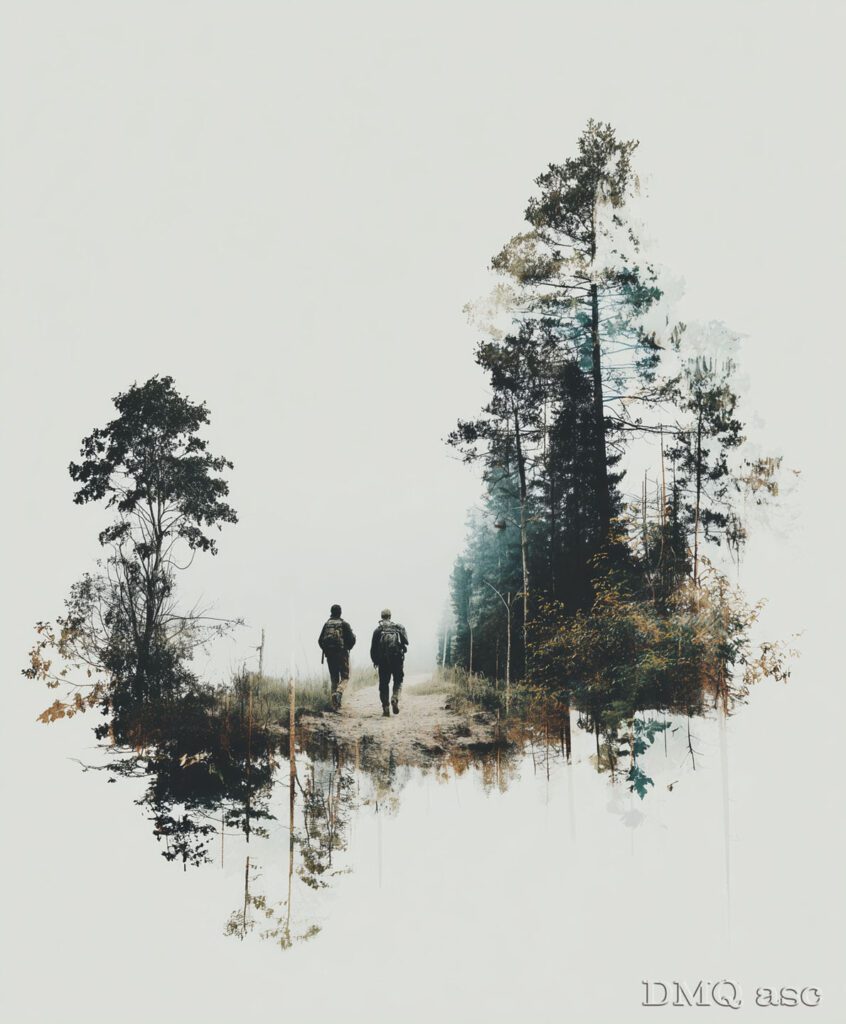
3. This effect is one of the simplest to create. A person’s profile was overlaid with another shot, and a soft black brush was used at the edges. On the left side, tree elements were inserted, while the fog was created with a simple gray-toned brush.
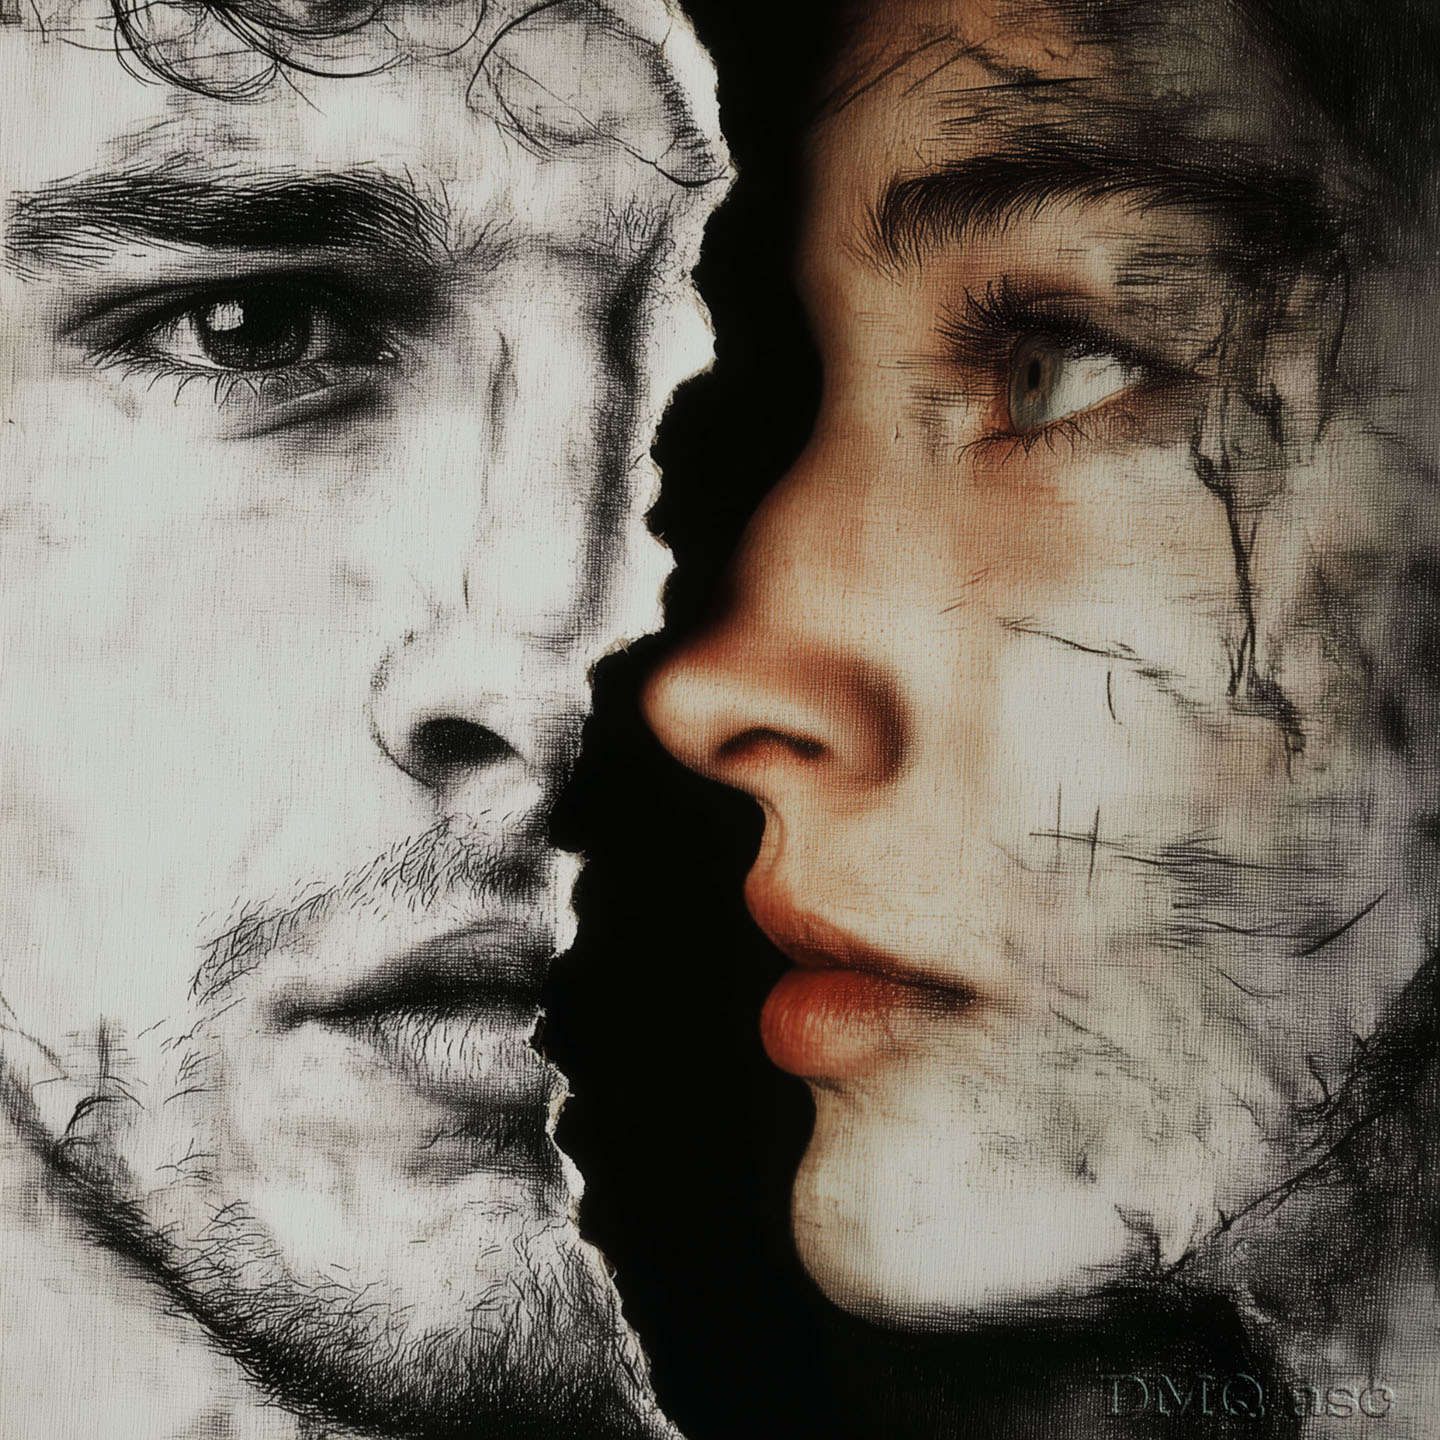
4. This graphic slightly diverges from the idea of exposure, since the original concept was to fit the cutout of a man into the outline of a woman’s profile. While working on it, I decided a better effect would be fraying the edges and adding a gentle shadow to the woman’s profile. Additionally, both images received a simple textured background using Photoshop filters, and the man’s image was separated by desaturating its colors. Smudges were created with a brush imitating black chalk, then locally blurred with Gaussian blur.

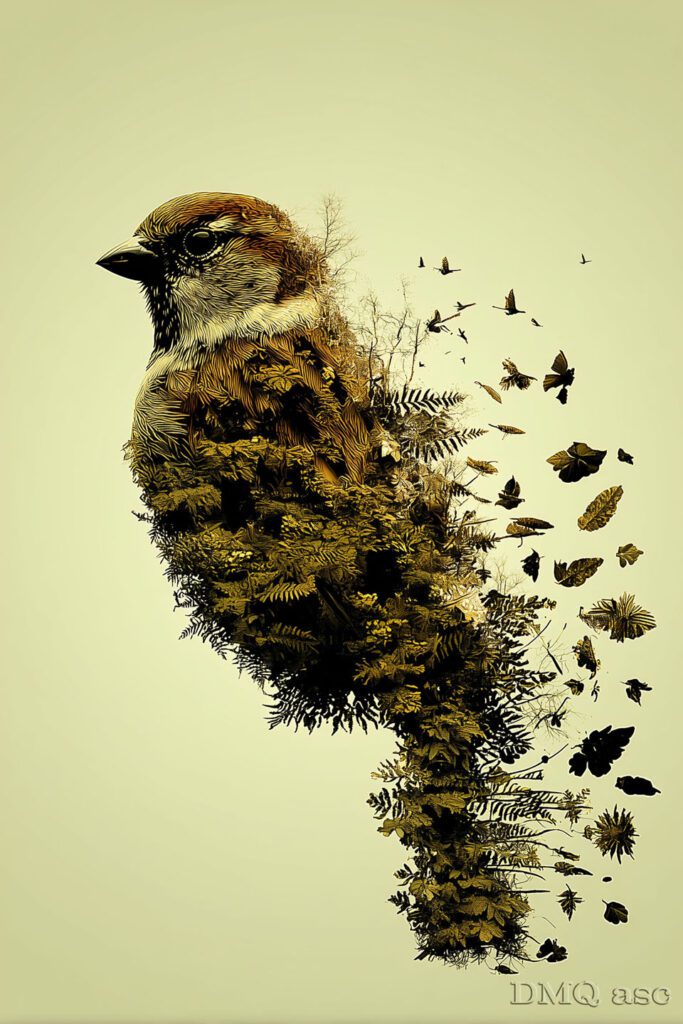
5. This graphic is also one of the simpler ones, as it’s about cutting out a bird from its vegetation background. The plants were isolated from their surroundings, and some individual leaves were added. They weren’t even necessary, since the bird was originally on a branch—those could just as well have been replaced with a stream or a forest path.
As shown in the description of the graphics above, the key consistent effect turned out to be skillfully blending the applied photos and brushes while maintaining a similar tone and exposure. Only the graphic with the woman and the man differs from this approach, but it was created completely independently from the double-exposure theme—which, in my opinion, only improved its overall reception in my eyes.
The selected graphics showcase my ability to transform and create visual effects of a given person, object, or landscape, based on the original background. The final outcome is subjective and reflects a specific time frame. Each of us perceives things differently, and each of us has a unique set of time resources and skills. Regularly published posts with specific thematic projects aim to systematically collect materials that demonstrate graphic possibilities.
Enjoy watching!